Wheel Chocks 101: How Many You Need And The Right Way To Use Them
A new year is a good time to refresh the basics that keep people, vehicles, and stock safe. Wheel chocks are simple bits of kit that prevent costly rollaways, near misses, and damage in loading bays and on stands. In this guide, you will learn when chocks are required, how many you need for trailers and aircraft, where to place them on slopes, and how to choose between rubber and PU. You will also get a step by step procedure and a quick pre departure checklist you can use with your team today.
What is the purpose of a chock?
A wheel chock is a shaped block that stops a parked vehicle or aircraft from moving. It works by creating a physical wedge against the tyre so gravity or vibration cannot make the wheel roll. Chocks complement parking brakes and jack stands, they are not a replacement. In busy yards or around aircraft, that small wedge can prevent a major incident.
If you are reviewing options, see our core range under wheel chock for sizes, loads, and tyre fit guidance for vans, HGVs, plant and more. For aviation operations, go straight to aircraft wheel chocks for aircraft where you will find rope linked pairs, eye bolts, and manufacturer style chock profiles.
Do you really need wheel chocks?
Yes, when there is any risk of movement. You should chock when:
- Loading or unloading at a dock or in the yard
- Parking on a gradient, even a slight one
- Working under or around the vehicle
- Leaving a trailer uncoupled
- Parking aircraft during turnarounds, refuelling, or maintenance
Brakes can release, air systems can bleed, and tyres can slip on smooth or wet surfaces. Chocks are a low cost control that removes uncertainty.
How many wheel chocks do I need for a trailer?
For HGV trailers, the common best practice is two chocks, one on each side of a single wheel or axle, placed on the downhill side relative to the slope. On level ground, two chocks fitted as a pair is still recommended, because lateral nudges and trailer bounce can overcome a single chock.
Use more chocks when:
- The gradient is significant or the surface is low friction
- The trailer is heavily loaded and the centre of gravity is high
- You are working for an extended period with frequent forklift entry and exit
For twin axle trailers, chock the axle that would move first if the trailer rolled. If in doubt, chock both axles. Our trailer wheel chocks pages show load ratings and typical tyre diameters to help you choose the right size.
How to properly chock trailer wheels
Follow this simple method on any surface:
- Park and brake: Stop the unit, apply the parking brake, select neutral, and turn off the engine. For an uncoupled trailer, ensure landing legs are down and secure.
- Assess the slope: Identify the downhill direction. Even small falls in the yard count. If you cannot tell by eye, place a small ball or bottle on the ground to test for roll.
- Position the chocks: Place the first chock tight against the tyre on the downhill side, at the 3 o’clock or 9 o’clock position relative to the wheel centre, so the tyre rolls into the chock, not over it. Fit the second chock on the opposite side of the same wheel or on the paired tyre if using twin wheels.
- Test stability: Gently release brake pressure or rock the trailer by hand to settle the tyre into the chock. Do not drive against the chock.
- Keep the area tidy: Make sure the ground is clear of ice, loose gravel, and spilled grain or pellets so the chock has grip.
- On departure: Remove chocks last, after the unit is coupled, landing legs are up, and the parking brake is confirmed off.
Tip for gradients: On uphill facing parking, chock the rear of the wheel. On downhill facing parking, chock the front of the wheel. On crossfalls or cambered bays, protect against side movement by placing chocks accordingly.
Aircraft chocks compared to HGV chocks
The goal is the same, but the details differ.
- Aircraft chocks
- Tyre sizes are larger, pressures are higher, and rim to ground clearance varies by aircraft type. Choose a chock height that fits snugly without contacting delicate sidewalls or wheel fairings.
- Use rope linked pairs so ground crew can deploy and retrieve safely without stepping into dangerous zones.
- Follow airline or airport SOPs for wheel positions to chock. Many operators require chocks fore and aft on at least the main gear, with nose gear chocking as specified by the operator.
- Visibility matters at night and in poor weather, so choose high visibility colours and reflective rope where available. See aircraft wheel chocks for aircraft for options and manufacturer style guidance.
- HGV chocks
- Focus on load rating, base grip pattern, and compatibility with common tyre sizes on tractor units and trailers.
- High visibility bodies help drivers and warehouse teams confirm chocks are in place from a distance.
- For yard operations, consider bolt down pivot points to keep chocks at the bay and reduce loss or theft.
Rubber or PU chocks, which is better?
Both materials are proven, the right choice depends on your environment.
- Rubber
- Heavy with excellent base friction, so they sit firmly on concrete and tarmac.
- Absorbs minor surface irregularities and grips well in the wet.
- Can harden with UV and age, so store out of direct sunlight and inspect for cracking.
- PU (polyurethane)
- Tough, wear resistant, and typically lighter to carry for frequent placement.
- Available in bright colours that improve visibility around busy bays.
- Less compressible than rubber, so look for base tread patterns that maintain grip on smooth floors.
For fire and rescue or incident response teams, a restricted height rubber chock can be useful around damaged vehicles where clearance is tight. For high turnover loading bays, a hi viz PU HGV chock can speed up handling, while staying easy to spot.
Theft prevention and bolt down pivot options
Chocks can go walkabout. To keep them where they are needed:
- Use a bolt down pivot at each loading bay. The chock swings into position when needed and parks flat against the wall or floor post use.
- Add short tethers with eye bolts on rubber chocks to a fixed point on the bay.
- Use high visibility chocks with bay identification so teams can see at a glance if a bay is missing its chock.
If you are planning a full bay upgrade, pairing chocks with loading bay wheel guides, dock bumpers, and clear bay markings will improve both safety and turnaround time. Our team can help you choose complementary kit under site safety equipment if you want a bundled approach.
Step by step quick procedure for teams
Use this simple script during toolbox talks:
- Before loading: Position two chocks on the downhill side of the trailer wheel, snug to the tyre. Confirm parking brake on.
- During loading: Check chocks remain seated after the first forklift entry. Re seat if needed.
- After loading: Keep chocks in place until landing legs are up, the unit is coupled, and the driver is ready to move.
- Stow: Return chocks to their pivot or storage. Inspect for damage before the next use.
Pre departure checklist
Use this 20 second check to avoid pull aways:
- Parking brake released, trailer brake released, and air lines coupled
- Landing legs fully raised and stowed
- Bay area clear, rear doors secure, tail lift stowed
- All chocks removed and accounted for
- Banksman or dock light shows green to go
Print and post this near each bay for quick reference.
Care and inspection
Chocks work best when cared for:
- Inspect weekly for cracks, cuts, hardening, or flattened tread on the base
- Clean off grit and salt, and store dry out of direct UV
- Replace if faces are rounded or if eye bolts, ropes, or tethers are damaged
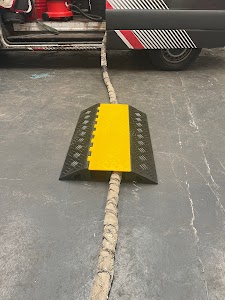
For mixed sites with cables and hoses across traffic routes, consider adding a cable protector ramp to keep surfaces even and reduce snags that might dislodge a chock.
Sizing, loads, and where to buy
Choosing the right chock is about tyre diameter, expected load, and surface. Our product pages include guidance to match chock size to common tyre sizes and axle loads:
- HGV and trailer chocks: start at wheel chock and trailer wheel chocks
- Aviation: see aircraft wheel chocks for aircraft for main and nose gear sets
If you prefer to talk it through, call +44 (0) 1246 472307. You can order online for quick dispatch or arrange collection from our Coleford warehouse.
Summary
Wheel chocks are small, but they do big work. If you chock every parked trailer during loading, chock any vehicle on a slope, and chock aircraft per your SOPs, you remove one of the most common rollaway risks in yards and on ramps. Two chocks per trailer is the norm, placed snug to the tyre on the downhill side. Pick rubber for maximum grip and PU for light handling and high visibility, then keep them on site with bolt down pivot mounts. Use the step by step procedure and pre departure checklist above to set a clear standard for your team. When you are ready to choose sizes and materials, our range is ready to help, and we are always happy to chat through your requirements.